By Molly Patrick
Apr 4, 2017,
By Molly Patrick
Apr 4, 2017,
Let’s just say that the Instant Pot (IP) is like a vibrator for your kitchen; useful, effective, highly recommended and something you will use often. If you’re subscribed to our Plant Fueled Meal Plans, the Instant Pot is a game changer for your batch cooking needs.
After using the IP for almost a year, I can safely say that it’s a must have. I can also safely say that it’s name is Instant Pot, not Insta Pot, like I was calling it for way too long. Insta Pot still makes more sense to me, but that’s not really my point with this.
My point is, the Instant Pot is awesome and today’s post will school you on this magical piece of kitchen equipment that I so often refer to as a sex toy. I have a lot to say about this little gem, so this week is the nuts and bolts and next week I’ll cover practical applications, tips and tricks, and answers to the most frequently asked Instant Pot questions that I get.
Before I go on, I should mention that I’m not being paid by Instant Pot to write this post, nor am I one of their affiliates (as a rule, I don’t take money in exchange for content). I just see a lot of people asking about the IP in our private Facebook group and when I see the same questions come up over and over, I take it as my cue to tackle, clarify and give you answers.
Okay – let’s do this.
As it turns out, the Instant Pot isn’t a sex toy, it’s actually a multi-functional electric pressure cooker (which is even better than a pocket vibrator if you ask me). The reason people are crazy for this gadget is because this ONE appliance can do a ton of cool shit.
On top of being an electric pressure cooker, it’s also a slow cooker and a rice cooker. It can sauté stuff, it can steam stuff, it can make yogurt, it can keep food warm for an extended amount of time and it can reheat leftovers. It also has a delay cook function that you can use if you want to throw something together and have it start cooking after you leave the house and keep it warm until you’re ready to eat.
Oh yes, this pony has many a trick.
There are three Instant Pot models to choose from:
- DUO
- LUX
- Smart
The DUO and the LUX come in two different sizes; 5 quart and 6 quart. The Smart only has a 6 quart option.
When you see the number after the model, like DUO50, that’s the DUO model in a 5 quart size. The DUO60 is the DUO model in a 6 quart size.
Same thing for the LUX model – the number after the model refers to the size of the cooker. LUX50 is the LUX model in a 5 quart size and the LUX60 is the LUX model in a 6 quart size. Easy enough.
All three models are multifunctional pressure cookers, with a few differences between them. Here are the most important differences to consider when choosing which one you want.
- Price – IP prices seem to go up and down a bit, but when I just looked on Amazon, the DUO60 was $99, the LUX60 was $79 and the Smart was $179.
- Pressure setting – The DUO has two pressure settings (high and low) and the LUX has one pressure setting (high).
- Warming time – The DUO can keep food warm for up to 99 hours and the LUX can keep food warm for up to 10 hours.
- Dedicated yogurt setting – The DUO has a setting that’s dedicated to making yogurt that isn’t included in the LUX. That said, you can make yogurt in the LUX, it just doesn’t have a specific button for it.
- The Smart model is a Bluetooth-Enabled version of the DUO that works with your phone and the Instant Pot app.
I have the LUX60 in my kitchen because the extra features of the DUO weren’t important to me. I love my model and would buy it again. It does everything I need and then some (more on that later).
Regardless of what model you choose, they all have the same basic parts:
- Stainless steel inner pot (kind of like inner peace but different)
- Cooking base and lid
- Cord (you know what a cord looks like)
The inner pot and the cooking base don’t require any special maintenance. The inner pot is made out of food grade stainless steel and it can be washed in the dishwasher or with hot soapy water. The cooking base should never, ever be submerged in water. To clean it, all you have to do is wipe it with a cloth.
The inner pot MUST be placed into the cooking base when you use your Instant Pot. This might sound obvious, but shit happens. I’ve heard about people putting ingredients directly into the base without first putting in the inner pot. Everything that goes into your IP will be put directly into the inner pot, NEVER the cooking base.
The lid is where a lot of the IP action happens. Here’s what you need to know.
1. Sealing ring
The sealing ring expands against the inner pot when heated to seal the pot and build up pressure. The sealing ring must be properly seated in the sealing rack for the IP to work.
So each time you use it, just check to make sure it’s secure and in place. If the sealing ring ever gets cracked or doesn’t fit properly, you must buy a replacement sealing ring. It’s also a good idea to take the sealing ring out of the sealing rack and wash it regularly.
2. Float Valve
The float valve pops up and becomes flush with the lid when the IP reaches pressure. This creates the final seal for cooking. When all the pressure is out of the pot, the float valve drops down and is no longer flush with the lid.
I expected a beep or a sound when the float valve pops up or drops down, but there is no sound. The Instant Pot is pretty silent in general, which is nice compared to my old stove top pressure cooker that was noisy as fuck.
3. Pressure release handle (AKA “handle” or “nozzle”)
First of all, the handle / nozzle (I refer to it as nozzle) is meant to be loose, so don’t think your IP is broken when you move it and it feels wonky and loose. The nozzle is important because it controls whether your pot reaches pressure or not. When using your Instant Pot as a pressure cooker, the nozzle must always be pointed in the Sealing position or it will never come to pressure.
When you want to release pressure, you move the nozzle to the Venting position (more on this shortly). You can clean your nozzle from time to time by pulling it up and off, wiping it, and then putting it back by firmly pressing down.
4. To close the lid you will need to align the arrows on the lid with the arrows on the cooking base and turn clockwise.
If the IP is plugged in you will hear a beeping sound when it is fully closed. If your lid isn’t closed properly, the pressure cooker won’t start and a flashing light will come on that says LID. The arrows are faint and kind of hard to see, but they are there and they are helpful for fitting the lid into place.
Now let’s talk about the gazillion buttons on the front of your IP that brought on a small panic attack and inspired you to put your brand new IP directly back in its box and hide it in your closet.
I have good news for you and your IP panic attack:
You will never use most of those buttons. Yup – you can totally ignore most of them.
There. Isn’t that better already?
Check it out. You know all those buttons that say Soup, Rice, Multi-grain, Bean/Chili, Poultry, etc… those are nothing more than regular pressure cooker settings that have pre-programmed cooking times.
So using the Manual setting accomplishes the same exact thing as using any of the pre-set function buttons. The only difference is, when you use the Manual mode, you set the cooking time.
So my advice is to ignore all those pre-set function buttons and just use the Manual mode when you use the IP as a pressure cooker. So that already makes it way less complicated because instead of fucking around with 12 buttons you only have to learn 6 buttons. #tackleandclarify
Here are the 4 buttons / modes that you will use most often.
Manual // Use this every time you use your IP as a pressure cooker. From steel cut oats to beans to soups to potatoes – use the manual mode. It gets the job done brilliantly.
Steam // This is awesome for steaming veggies or heating up leftovers.
Slow Cook // This takes the place of a crock pot or traditional slow cooker and cooks things on low heat for an extended amount of time. It’s like the opposite of using it as a pressure cooker. Using your IP as a pressure cooker cooks things super hot and super fast and using it as a slow cooker cooks things at a lower temperature for a longer amount of time.
Sauté // This is brilliant because it allows you to saute veggies directly in the inner pot and then go right into your recipe without having to use a skillet to saute and then transfer the ingredients to the pressure cooker. It saves a step and dishes. #ipwin
Now let’s go over the buttons that you will use to control the 4 buttons / modes I just went over.
Minus and plus keys // These are the buttons you will use most often. You will use these buttons to add or subtract minutes from your cooking time.
Adjust // You will use this button for adjusting the heat when you use the saute function.
Timer // You will use this button when you want to delay cooking time.
Keep warm / Cancel // This is another button you will use a lot because Cancel is how you turn your IP off and Keep warm keeps your food warm but stops the cooking function.
Pressure / This button is only on the IP DUO // This allows you to select high or low cooking temperature for pressure cooking. If you have the LUX model, the default pressure cooker temperature is high – which works great for everything I’ve used it for. Even if you have the IP DUO, it’s rare that you would use anything but high pressure.
Now it’s time to walk you through the two different release options for when your food is done cooking.
If you look near the handle / nozzle on the IP lid, you will see two options, Venting and Sealing. Anytime you use your IP as a pressure cooker, this nozzle must be pointed in the Sealing position because this seals the cooker so it can build pressure. If this nozzle is in the Venting position, your IP will never fully seal and it will never reach pressure.
That’s bus stop number one.
Next – when the timer goes off, indicating the time is up and your food is ready, there are two ways to release the pressure.
- Quick Release Method
- Natural Release Method
The Quick Release Method is when you carefully turn the handle / nozzle from the Sealing position to the Venting position directly after the timer goes off, releasing a bunch of steam through the top of the handle / nozzle until all the pressure is out of the IP and the Float Valve pin drops. This is the fastest way to release the pressure out of your IP, but it’s not always the best way.
The other option is the Natural Release Method.
The Natural Release Method is when you let the pressure come down naturally on it’s own. With this method you literally don’t do anything but wait. The timer will beep when the time is up and then you just leave it be until all the pressure is out and the Float Valve pin drops.
You know all the pressure is out of your IP when that little float valve pin on top of the lid drops down. There isn’t a sound when this happens, but it usually takes about 10 – 20 minutes depending on what you have in your cooker and how much.
You will not be able to open the lid to your IP unless this pin has dropped, so you don’t have to worry about opening the lid prematurely when pressure is still in the pot. If your IP still has pressure in it you will not be able to open it. This is just one of 10 safety features that the IP comes with (which is why you don’t have to worry about it exploding or malfunctioning – another bonus).
You can press the Cancel button when the timer goes off, but this will not affect the speed in which the pressure comes down. So leave it on or hit Cancel, it makes no difference.
Here are some things to consider when deciding whether to use the Natural Release Method (NRM) or the Quick Release Method (QRM).
- When using the NRM, whatever is in your IP will continue to cook while the pressure is coming down – even if the IP is off. So if you’re cooking something that isn’t forgiving with cooking times and shouldn’t be cooked for longer than absolutely necessary, like steamed veggies, always use the QRM. This will get the pressure out of the IP quickly so you can open the lid and remove your food ASAP.
- When cooking anything that has a tendency to break apart, like steel cut oats, mung beans, lentils, split peas, black beans, pinto beans – always use the NRM. This will ensure that your food doesn’t split apart and come up through the pressure release exhaust. This is important because if food gets up in these parts, your IP won’t work as well overall.
- Unless I’m steaming veggies, I use the NRM. I also sometimes use a combination of the two. You can use the NRM to let the pressure come down on its own for a bit and then use the QRM towards the end. This will speed up the process without breaking ingredients apart. If you want to use the NRM and you’re pressed for time, you can place a cool damp towel over the top of the lid and this will help the pressure come down faster on its own without using the QRM.
Here are a few more things to keep in mind about this release business.
- Do not touch the metal part of the lid anytime during cooking or cooling down because it gets super fucking hot.
- Use a wooden spoon, dish towel or pot holder when you turn the handle / nozzle from sealing to venting.
- Do not put your head over the top of the IP when you use the QRM because hot steam in your face is not something you want (unless of course it’s in the form of a facial at a spa. In that case, sign me up please).
Here’s the general sequence you will go through when using your IP:
- Place the inner pot in the cooking base.
- Place your ingredients into your inner pot.
- Lock the lid into place.
- Point your nozzle in the Sealing position.
- Select your setting and set the time (once you set your time, it will automatically start in 10 seconds – you don’t have to press anything else)
- Allow your IP to do it’s thang and wait for the timer to go off.
- Release the pressure using the Quick Release Method or wait for the pressure to come down on its own using the Natural Release Method.
- Take off the lid.
- Do a dance because you just used your Instant Pot like a BOSS!
The only time you wouldn’t use this sequence is when you use the Saute mode because with the saute mode you leave the lid off.
One more quick note about this. The IP starts counting down the time you set after it reaches pressure. For example, let’s say you’re cooking steel cut oats and you pressed the Manual button and used the arrow keys to select 10 minutes. These 10 minutes won’t start being counted down until after your IP reaches pressure, which might take 7 – 10 minutes.
So when an IP recipe has you set the time, know that this time does not include the time it takes to build up pressure or the time it takes for the pressure to be released. You don’t have to take this into consideration or do anything about this when following IP recipes, it’s just a heads up so you know when an IP recipe says 15 minutes, that’s just the cooking time at pressure. The entire process might take 30 minutes (10 minutes building pressure, 15 minutes cooking time, and 5 minutes releasing pressure – just as an example).
A couple more things before we wrap. Your IP comes with a detailed manual and instruction booklet. As much as I hate guides and manuals, it was super helpful to sit down with it and read it cover to cover. I recommend cracking open that manual and getting intimate with it. It can only help you get familiar with your new love.
We have new Whole-Food Plant-Based Instant Pot recipes in our weekly meal plans all the time, so if you want to learn new IP recipes on the weekly, join the meal plans here.
PHEW – that was a lot!
Good job getting through it – you only have to learn this stuff once and then you know it and you can put it to use!
If you didn’t catch part two of this post yet, Instant Pot tips and tricks and answering the most frequently asked IP questions, get your booty over here!
How do you use your instant pot? Talk to me in the comments below.
Today’s recipe isn’t so much a recipe as it is a method. After you see how easy and fast it is to cook potatoes in the Instant Pot, you won’t want to cook them any other way!
Instant Pot Potatoes

Ingredients
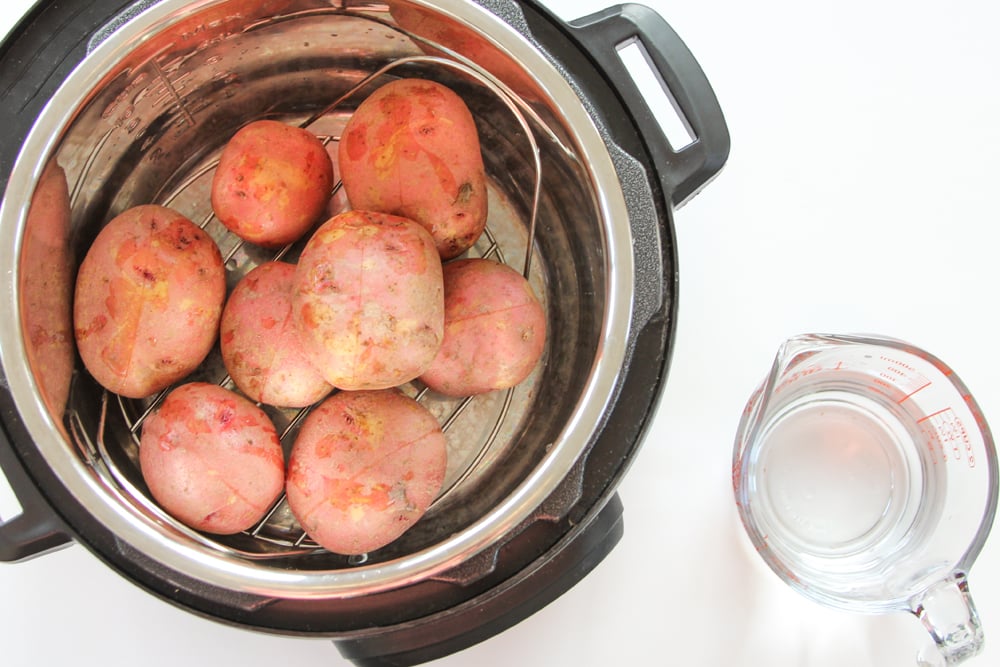
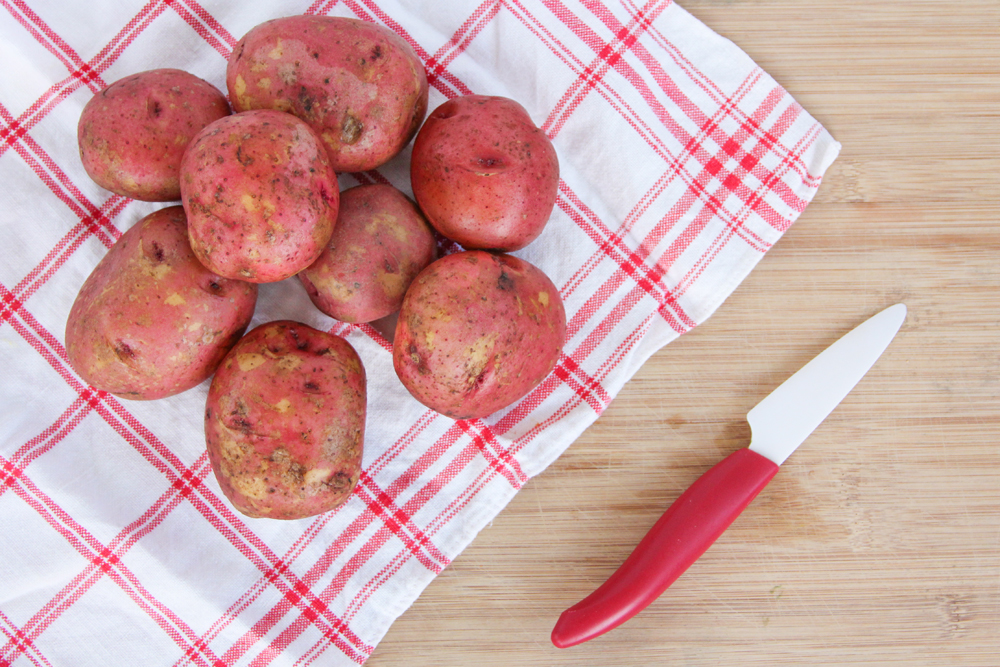
- Potatoes washed and scored down the middle
- 1 cup water 235ml
Instructions
- Place the inner pot into the cooker base and set the trivet that came with your IP in the bottom of the pot.
- Pour the water into the pot and then place the potatoes on the trivet. Lock the lid into place, making sure the nozzle is in the sealing position.
- Use the manual setting and set the timer for 15 minutes. Use the natural release method when the timer is up. When all the pressure is out of your pot, carefully remove the lid and allow your potatoes to cool a bit before you use them.
Notes



Wishing you a happy week. May it be filled with making your life easier.
Xo
Molly
9 Comments
Leave a Comment
You may also enjoy...
Love the food that loves you back
Get instant access to thousands of plant-based recipes and meal plans, no credit card or perfection required.




I love the potato salad recipe!
Simple enough recipe but I did not know that I would have to scroll through the entire history of the insta pot to get to it.
Hi Greg, check out this simple trick to avoid scrolling through the entire page. ~Karen
Hi,this is about the instant pot. On Amazon the DUO 6 quart is 25$ less than the Lux 6 quart. If the Duo has more features, even though unneccessary, I wonder why is it so much less? I’d rather not spend 100 if possible. Any thoughts on this? Thanks, I love your site!
Awesome information about using the Instant pot
Thanks for stopping by, Paula! ~Karen
Do I need to puncture the potatoes b4 putting them in the Instapot?
NVM..I just reread it & saw that you said to score the potatoes!?
The only blog i have read about the Instant Pot and surely the finest! much gratitudes!